|
Resource requirements define the total amount of time required for each time period across the life of the workspace for a specific type of resource. When adding a new requirement, the you need to select which resource type you would like to define.
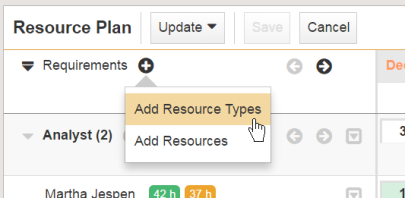
To add a new requirement:
 in the “Resources” line near the top of the Resource Plan.
 Once the new resource typess are added, the Resource Plan is put into Edit mode. The user may then edit the requirements for each resource type as desired before clicking the Save button (see Editing a Requirement). Clicking the Save button commits the changes to the Resource Plan. Clicking Cancel will revert any changes, and any newly added resource types will be removed.